Bonneville Hot Rod Streamliner - 01-21 Update
Jan 13, 2015 19:23:52 GMT -4
Post by BERNARD "HOT ROD" KRON on Jan 13, 2015 19:23:52 GMT -4
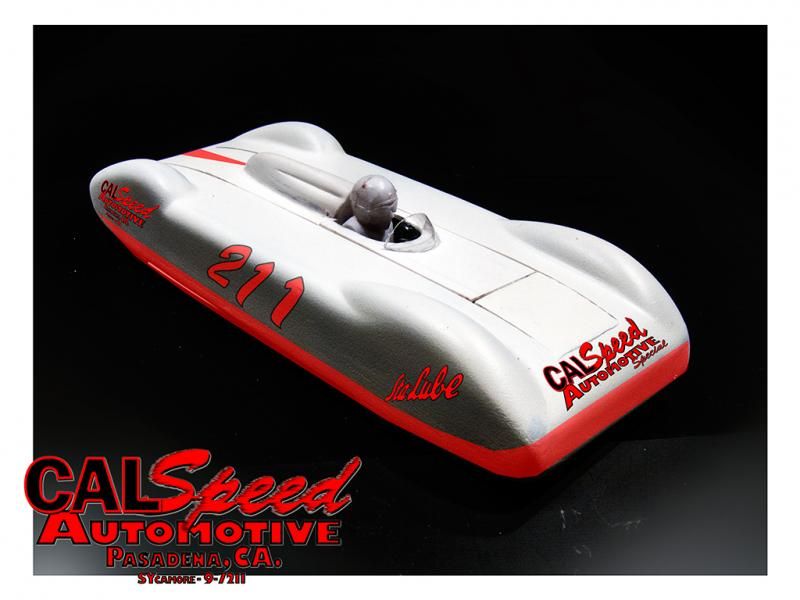
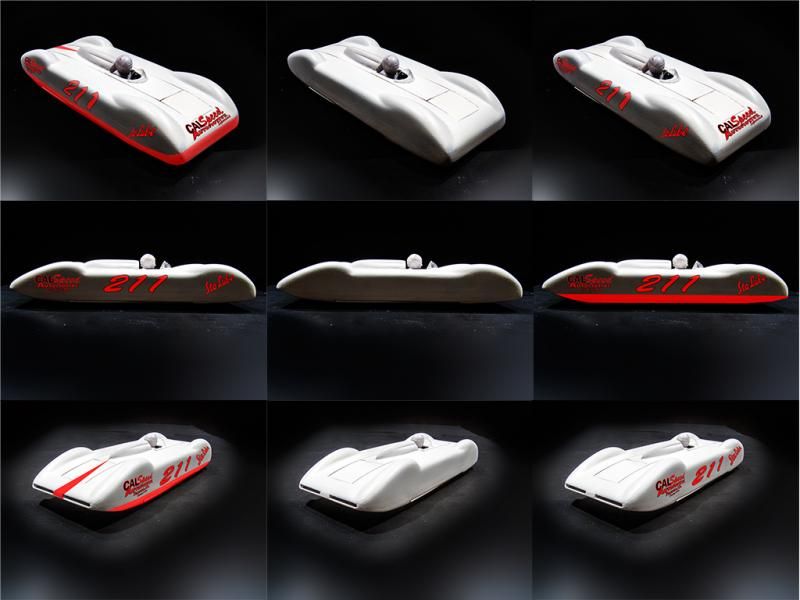
One of the themes of this year’s NNL West is LSR cars. LSR is a loose term referring to “Land Speed Record” cars. Over the years the expression has broadened in its meeting from specifically cars designed to go for the world Land Speed Record to more generally streamliners and streamlined cars designed to run on dry lakes or salt flats. For example a streamlined modified ’53 Studebaker coupe can be referred to as an LSR car, as can old school belly tankers. In this spirit I decided to build an early postwar period hot rod streamliner, in the style of cars like the SoCal streamliner from around 1950.
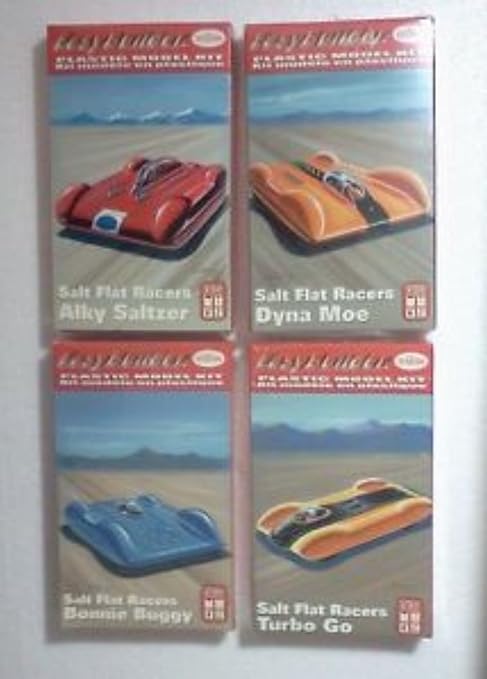
The idea came to me when browsing on eBay and encountering the Testors EasyBuilder streamliner cars. These are little 1/32nd scale plastic models originally produced in 1961 by Hawk as rubber-band powered cars. They are ultra simple model car kits with no underpan, four wheels, two axles and a basic streamliner body shared by all four variations. The only difference between them other than the color they are molded in is the long rectangular plastic strip which runs down the middle of the topside and the related bubble top. These determine whether the car is dual engine, single engine, front engine, rear engine and where the driver is located.
Here’s a picture of the kits. I bought the Bonnie Buggy for less than 10 dollars including shipping. I figured it was like buying a resin body.
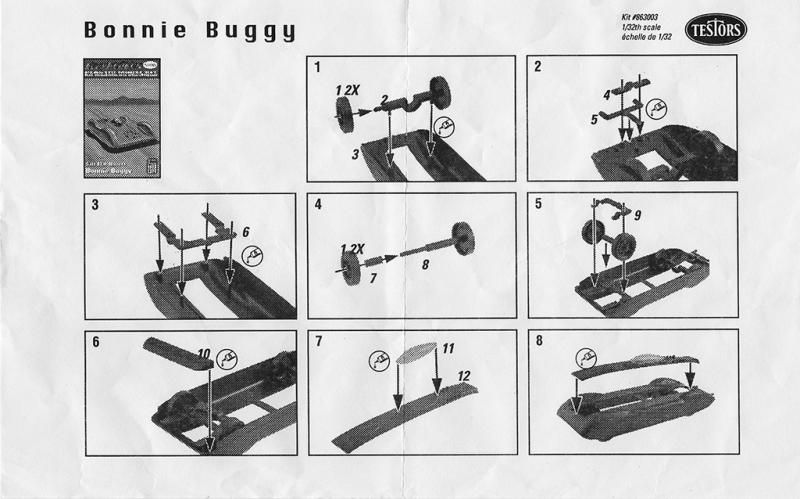
Here’s a scan of the instruction sheet. Beyond basic!
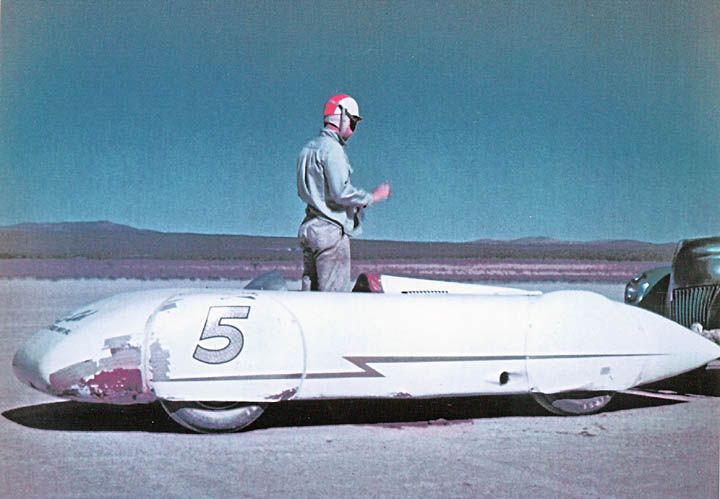
My plan was to build a 1/25th scale model from this 1/32nd scale kit. The original Hawk models were supposed to represent the big aero-engined LSR car like Malcolm Campbell’s Bluebird. So they have tiny little bubble canopies to create that illusion. But you can easily fit 1/25th scale tires inside the body and the overall look is that of the hot rod streamliners I referred to earlier. Here’s a picture of the iconic SoCal streamliner in 1950 with the driver standing up in the cockpit. These cars were incredibly compact with small frontal area and low weight. That’s how this flathead powered car could average 208.927 mph at Bonneville that year.
I started on this car in December, but between the Holidays and finishing my 3-window Deuce Coupe model I had going at the time, I didn’t get much further than some basic fitting and modification work. I determined that a flathead Ford motor could fit, albeit with clearance for the carburetors which would stick up slightly above the deck line. My original plan had been to build a full detail model for the NNL West but I soon realized there just wasn’t going to be enough time to scratch-build a chassis and suspension, let alone do all the bodywork I had planned. So I decided I would do a slammer style build using the driver figure from the recent Monogram Slingster release, which has a nicely detailed face and the right period style helmet and goggles. I would make sure that everything I did would allow me to go back and add the chassis later.
The first thing I noticed about the Bonnie Buggy was that the shape of the nose would virtually guarantee the car would get airborne due to front end lift. So I decided to modify the nose so it would be lower and more blunt. The body also has an indented lower panel that runs front to rear that would need to be filled in order to allow me to extend the sides downward a few scale inches to adjust for the additional ground clearance the 1/25th scale tires created. And lastly, I would have to discard the kit center strip and create a new central panel in order to control the driver and engine locations.
Here’s where I’m at today with less than 3 weeks to go until the NNL West. It’s going to be a real thrash just to get a slammer done in time. I think I can do it but it may show up in white primer with some red numbers and Sta-Lube decals rather than a proper glossy paint job. We’ll see!
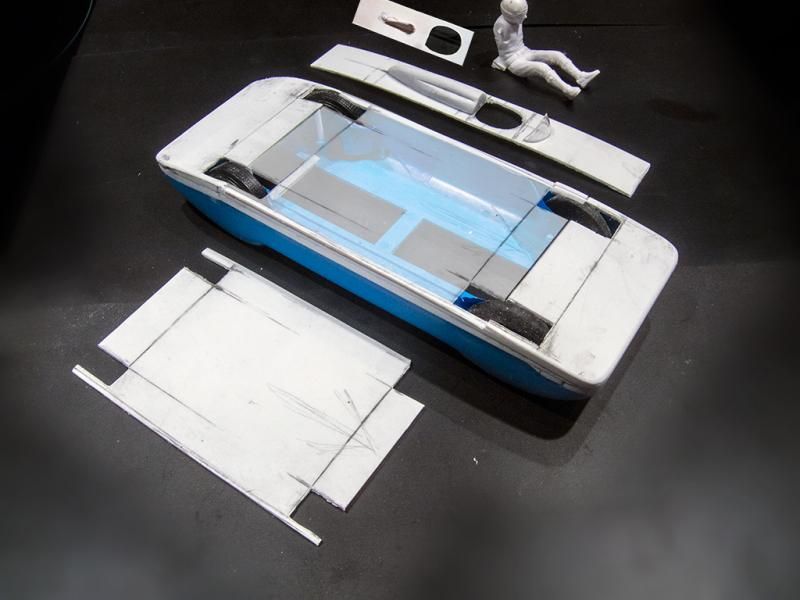
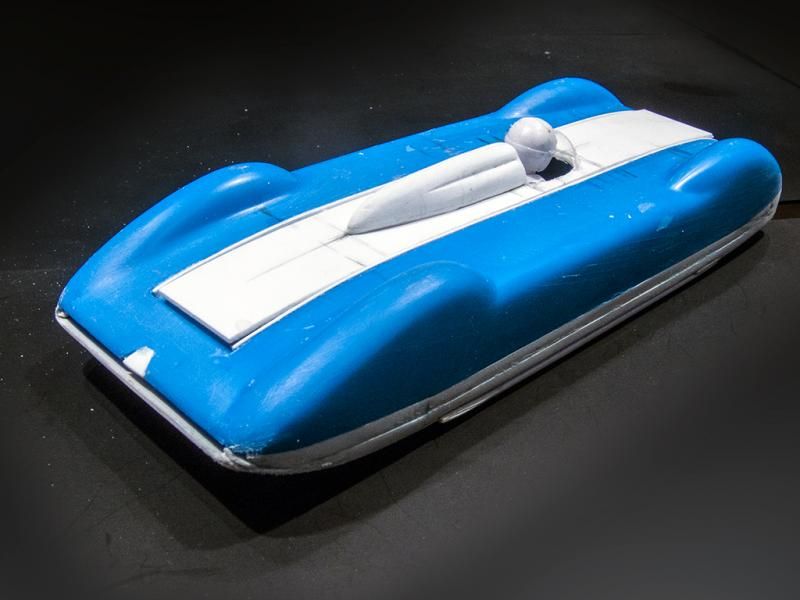
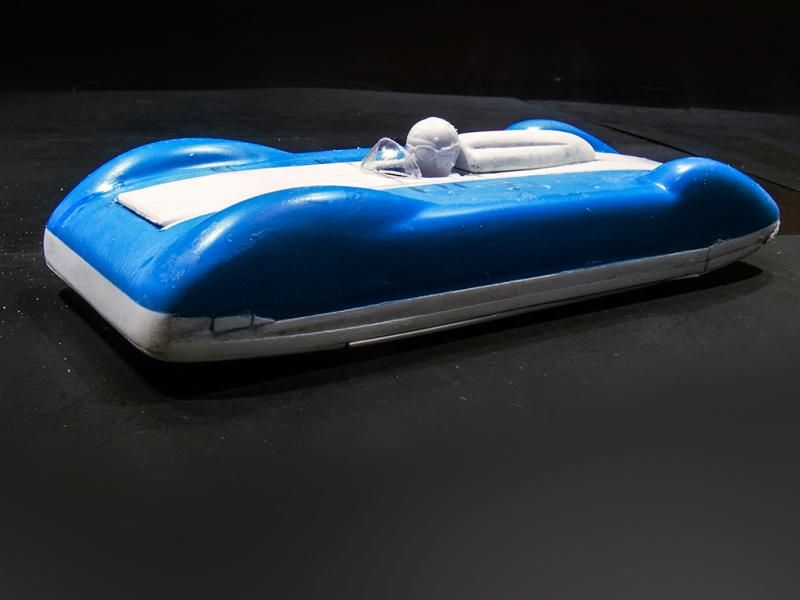
Here are the basic parts for my slammer. The driver will get his arms and depending on the final size and shape of the cockpit opening I may add a steering wheel. The headrest and engine cover was sculpted out of styrene strip with my Dremel. The underside of the headrest was open up to allow for clearance of carburetors when I go back and build the full-detail version. The bellypan was made from styrene sheet and the central panel will be glued using temporary adhesive.
This is a side view with an inset showing the original shape of the nose. All the white plastic is styrene strip and sheet I added to fill the side panel inset and form the new nose shape.
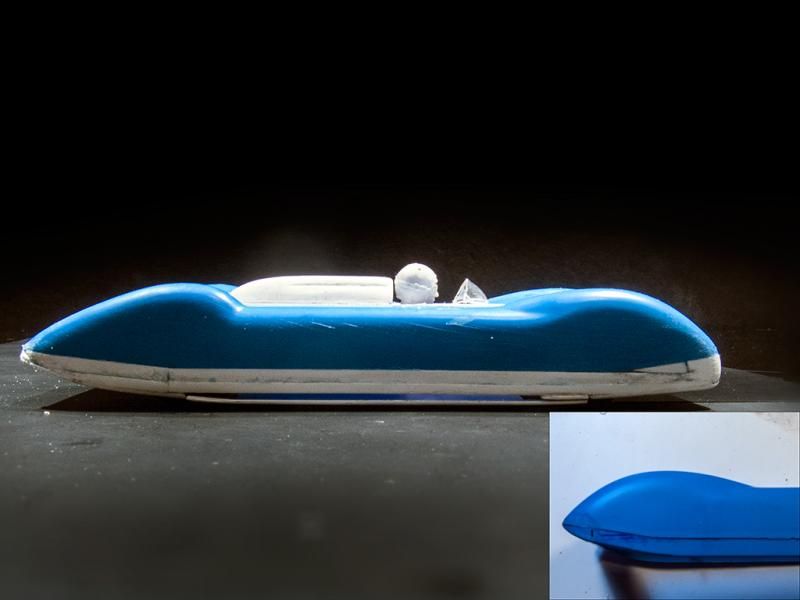
Below are a couple of final shots. The tail will have the opening slot you see to allow for exhaust of internal air pressure, rather than using louvered bodywork. I have a lot of work ahead of me. The center strip needs to be cut into individual panels and the end pieces glued into position and smoothed into the bodywork. The side surface, nose area and tail still need some more filling and shaping, too. It should be an interesting 3 weeks!
Thanx for lookin’,
B.
The idea came to me when browsing on eBay and encountering the Testors EasyBuilder streamliner cars. These are little 1/32nd scale plastic models originally produced in 1961 by Hawk as rubber-band powered cars. They are ultra simple model car kits with no underpan, four wheels, two axles and a basic streamliner body shared by all four variations. The only difference between them other than the color they are molded in is the long rectangular plastic strip which runs down the middle of the topside and the related bubble top. These determine whether the car is dual engine, single engine, front engine, rear engine and where the driver is located.
Here’s a picture of the kits. I bought the Bonnie Buggy for less than 10 dollars including shipping. I figured it was like buying a resin body.

Here’s a scan of the instruction sheet. Beyond basic!

My plan was to build a 1/25th scale model from this 1/32nd scale kit. The original Hawk models were supposed to represent the big aero-engined LSR car like Malcolm Campbell’s Bluebird. So they have tiny little bubble canopies to create that illusion. But you can easily fit 1/25th scale tires inside the body and the overall look is that of the hot rod streamliners I referred to earlier. Here’s a picture of the iconic SoCal streamliner in 1950 with the driver standing up in the cockpit. These cars were incredibly compact with small frontal area and low weight. That’s how this flathead powered car could average 208.927 mph at Bonneville that year.

I started on this car in December, but between the Holidays and finishing my 3-window Deuce Coupe model I had going at the time, I didn’t get much further than some basic fitting and modification work. I determined that a flathead Ford motor could fit, albeit with clearance for the carburetors which would stick up slightly above the deck line. My original plan had been to build a full detail model for the NNL West but I soon realized there just wasn’t going to be enough time to scratch-build a chassis and suspension, let alone do all the bodywork I had planned. So I decided I would do a slammer style build using the driver figure from the recent Monogram Slingster release, which has a nicely detailed face and the right period style helmet and goggles. I would make sure that everything I did would allow me to go back and add the chassis later.
The first thing I noticed about the Bonnie Buggy was that the shape of the nose would virtually guarantee the car would get airborne due to front end lift. So I decided to modify the nose so it would be lower and more blunt. The body also has an indented lower panel that runs front to rear that would need to be filled in order to allow me to extend the sides downward a few scale inches to adjust for the additional ground clearance the 1/25th scale tires created. And lastly, I would have to discard the kit center strip and create a new central panel in order to control the driver and engine locations.
Here’s where I’m at today with less than 3 weeks to go until the NNL West. It’s going to be a real thrash just to get a slammer done in time. I think I can do it but it may show up in white primer with some red numbers and Sta-Lube decals rather than a proper glossy paint job. We’ll see!
Here are the basic parts for my slammer. The driver will get his arms and depending on the final size and shape of the cockpit opening I may add a steering wheel. The headrest and engine cover was sculpted out of styrene strip with my Dremel. The underside of the headrest was open up to allow for clearance of carburetors when I go back and build the full-detail version. The bellypan was made from styrene sheet and the central panel will be glued using temporary adhesive.

This is a side view with an inset showing the original shape of the nose. All the white plastic is styrene strip and sheet I added to fill the side panel inset and form the new nose shape.

Below are a couple of final shots. The tail will have the opening slot you see to allow for exhaust of internal air pressure, rather than using louvered bodywork. I have a lot of work ahead of me. The center strip needs to be cut into individual panels and the end pieces glued into position and smoothed into the bodywork. The side surface, nose area and tail still need some more filling and shaping, too. It should be an interesting 3 weeks!
Thanx for lookin’,
B.


