Deleted
Deleted Member
Posts: 0
|
Post by Deleted on Mar 28, 2013 21:00:47 GMT -4
man john that thing is off the scale l would love to see that done Heres a bike i'm working on along with a trike. ;D 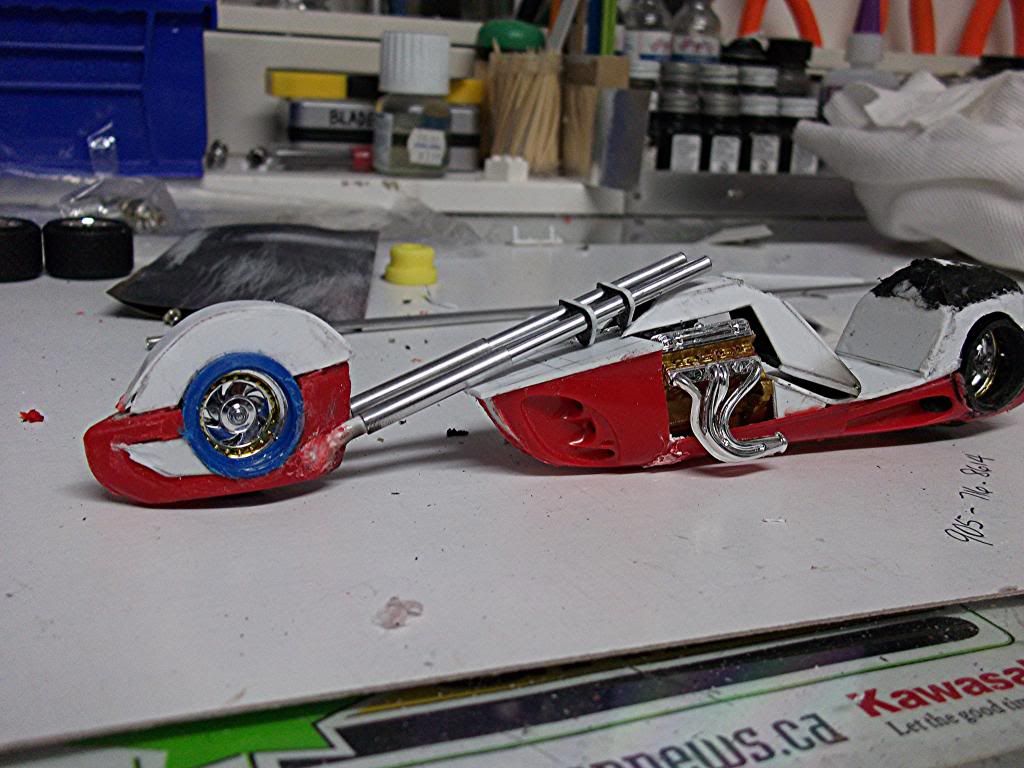 |
|
|
|
Post by KRAZY RICK on Mar 29, 2013 1:00:06 GMT -4
Holy Crap, you guys are going all out !!!! That's going look wicked Jim, ( I do prefer the smaller bolt also )- I was painting mine on & off all day ...... very soon ...... time for assembly !!!
|
|
|
|
Post by ACDP5859 on Mar 29, 2013 10:15:00 GMT -4
The BIGGER one looks more accurate and to scale.  But in the end, the choice is yours.  One more thing you could try is a POLYCARBONATE paint. It's a paint for Clear lexan R/C Bodies. Get a spray can, or a small bottle of black and try it. It's made to bite into plastic without harming it. I KNOW it will work on the straw.  I used it on straws before to make them look like side pipes and stacks on some R/C cars and trucks. |
|
|
|
Post by AzWildman on Mar 29, 2013 12:50:03 GMT -4
Thank-You ACDP5859 for your tech tip. More than a tip, a solution. Since it has been tried and tested by you. It is too late for me to make it to my local R/C shop, for this build. But I was planning to use fork boots on my next bike and I will for sure use your idea on it. I agree the bigger bolt looks better, but if you"ll notice the top of the fork tube tapers, this means I would have to counter sink the bolt(boot) to slip over top to make it look right. These bolts are tough to drill. I could look for aluminum or nylon bolts but running out of time on this build. And I already drilled out another smaller one.
Your Input is valued. Thanks again
Jim
|
|
|
|
Post by ACDP5859 on Mar 29, 2013 13:19:02 GMT -4
Look back at the other picture of the straw. It looks the same as the big bolt. The only difference is that the bolt spirals and it doesn't taper in at the end. And the straw has large and small rings, and the smaller rings are at the top and bottom. You could taper the end of the bolt. Or go with plastic, or aluminum tubes and the straw.
|
|
|
|
Post by AzWildman on Mar 29, 2013 14:27:20 GMT -4
Yeah, you're right. The sizes did match better, I like the look of the straw, but that bigger bolt sure made the front end heavy. That's why I'm gonna try your paint idea on the next one. I started late on this challenge, it's all I can do to miss the deadline already. haha
Thanks, Jim
|
|
|
|
Post by AzWildman on Apr 4, 2013 22:51:24 GMT -4
Well Fellas, After 17 days of work, I didn't quite make it - but it got me out of a building slump; I will finish it and post it next week in Bikes & Trikes. Thank you for your support along the way - here's how far I got: 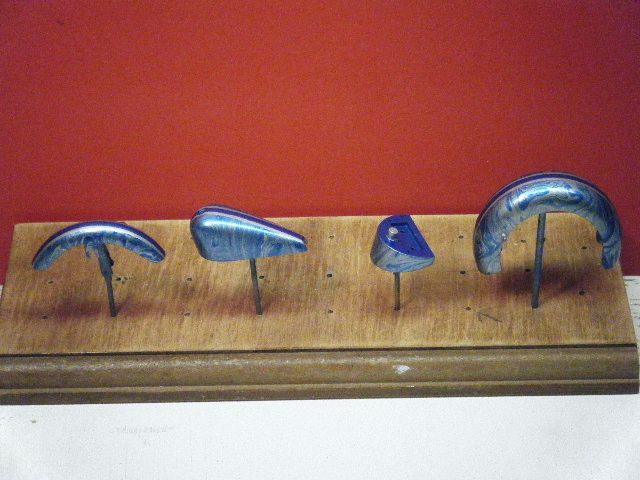 Metallic silver base, Swirladelic artwork and Oldsmobile Engine Blue stripe 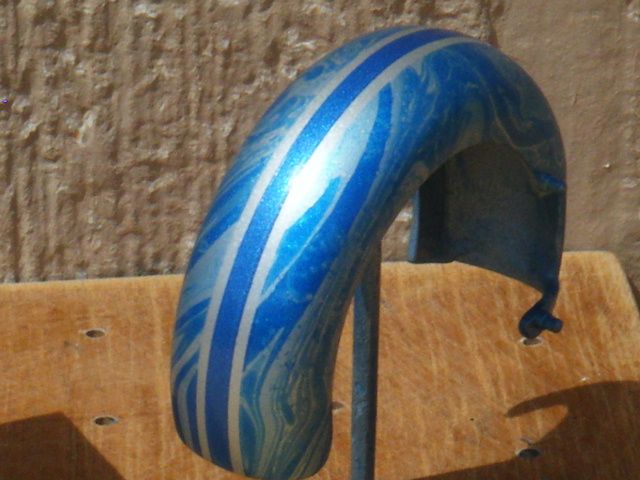 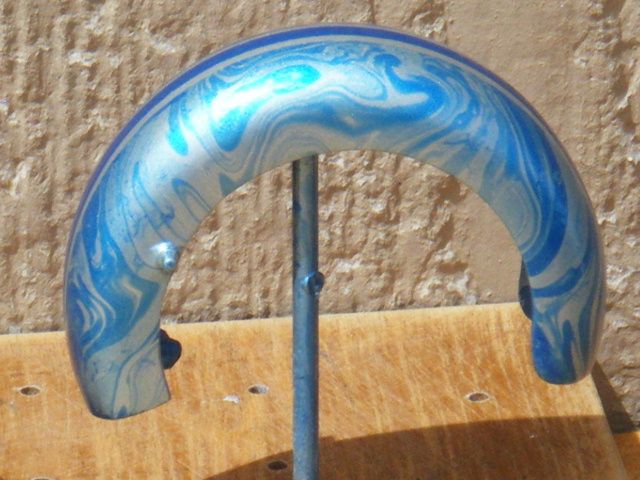    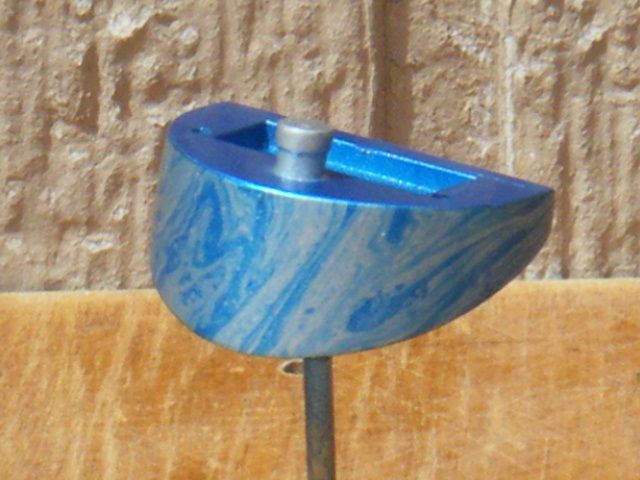 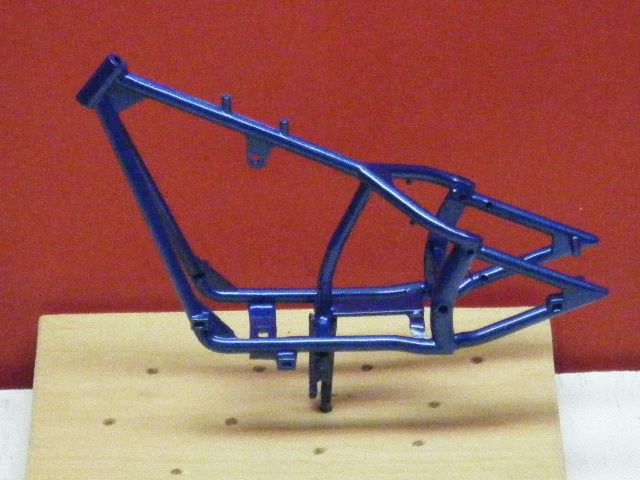 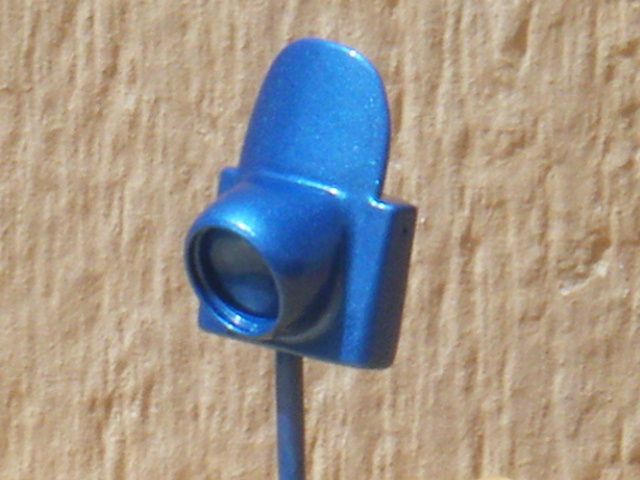  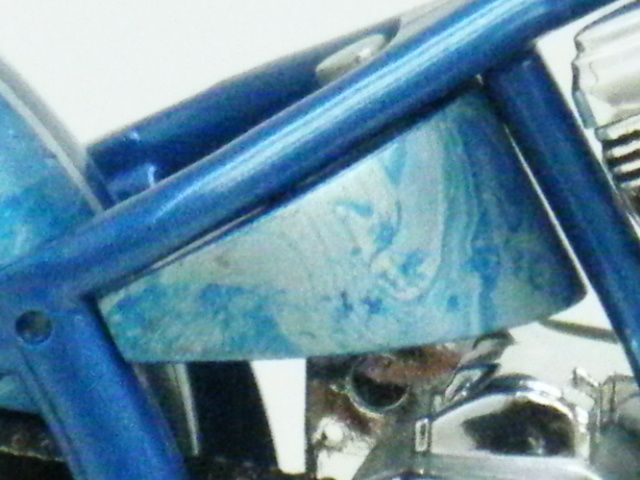 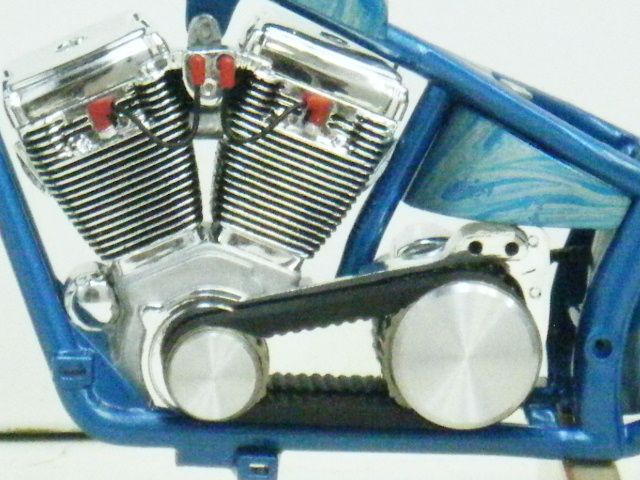 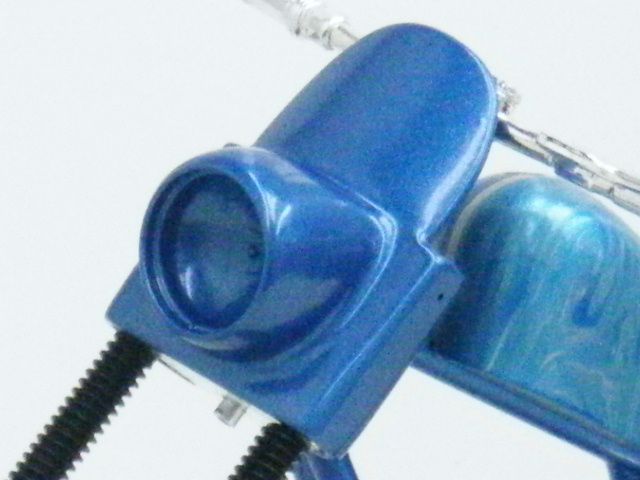 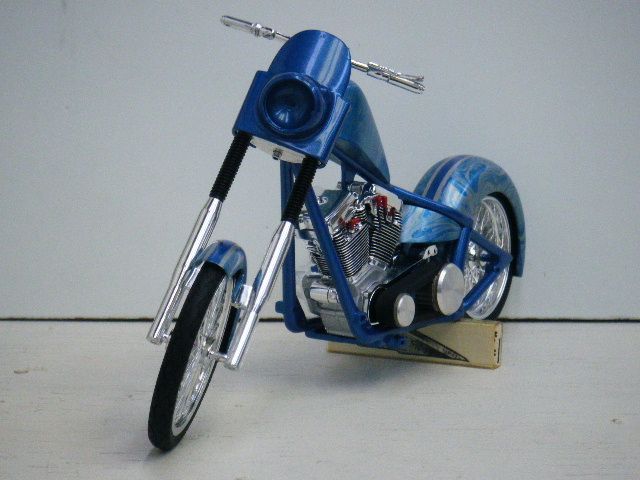 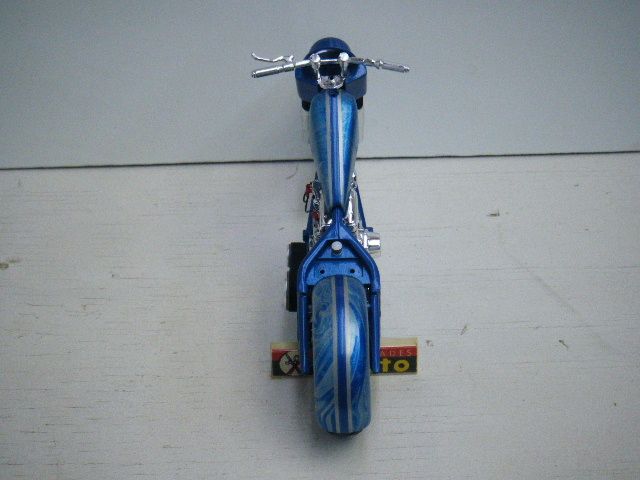 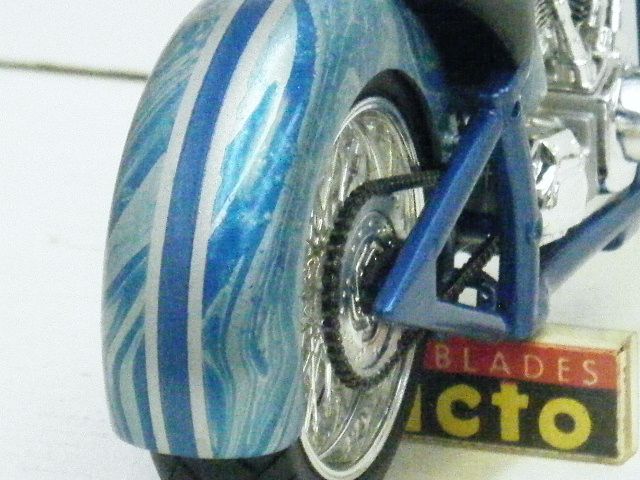 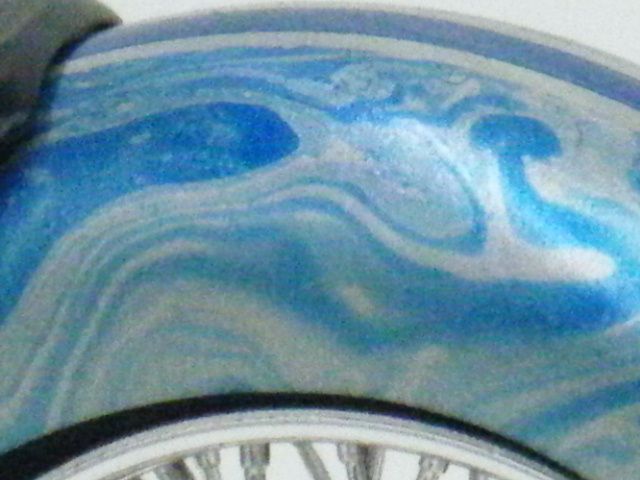 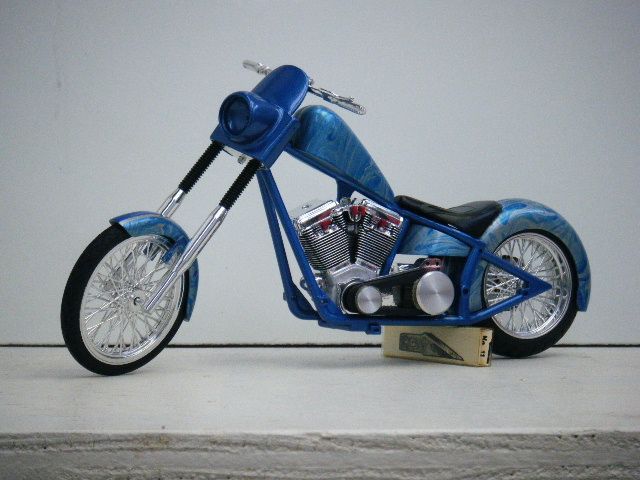 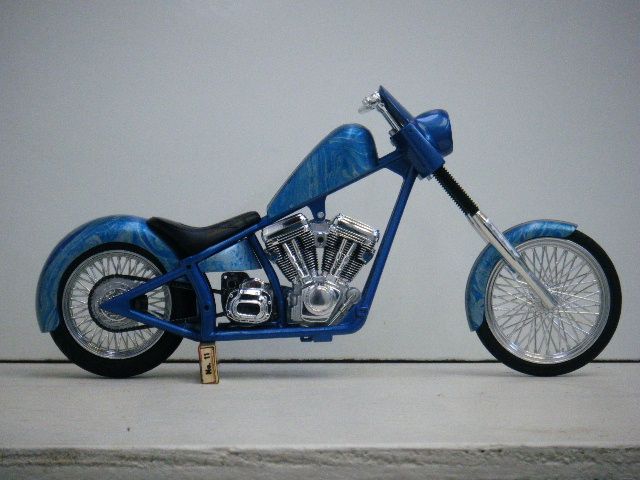 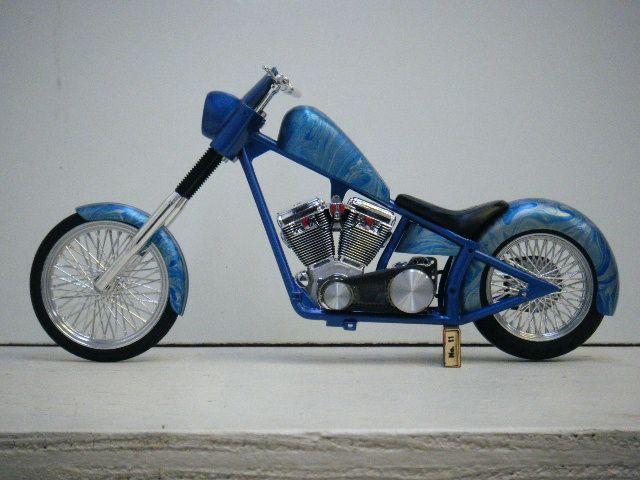 This is just the mock-up; will come all back apart. Still need shoot urethane clear, oil lines, cables, turn signals/mirrors, carb, air cleaner, exhaust pipes and a few other miscellaneous pieces.  Here are the mirror/turn signals. I am not real happy with the gas tank, so here is a new one in German Silver Metallic, ready for Swirladelic art work, blue stripe and clear. Thanks for your patience and your viewing; sorry I didn't make the deadline but look for this one soon in Bikes & Trikes. Congratulations to everyone who got their projects done! Thank you, Jim |
|
Deleted
Deleted Member
Posts: 0
|
Post by Deleted on Apr 5, 2013 1:01:20 GMT -4
well you gave a good shot
and that paint is really nice
and it looks like that's going to a great build when it's finished
|
|
|
|
Post by AzWildman on Apr 5, 2013 1:52:04 GMT -4
Thanks Joe,
I'll have it done next week, I appreciate your support.
Jim
|
|
|
|
Post by KRAZY RICK on Apr 5, 2013 2:21:54 GMT -4
Really dig that Freakin paint Jim - WiLd !!!!! - Don't feel bad; I'll be posting my 2nd build this week also
|
|
|
|
Post by BRITBOY on Apr 5, 2013 3:44:48 GMT -4
The swirladelic revival starts here! That's a very classy look Jim.
My efforts are currently sitting by the side of the road in a haze of smoke and burnt oil. They will be pushed across the finish line some time soon if it kills me!
|
|
|
|
Post by KRAZY RICK on Apr 5, 2013 4:59:26 GMT -4
|
|
Deleted
Deleted Member
Posts: 0
|
Post by Deleted on Apr 5, 2013 8:12:45 GMT -4
Hey Jim!!,,looking good!!!  love the paint scheme!!!,,going to be killer when done!!  |
|
|
|
Post by JOE66 on Apr 5, 2013 13:45:57 GMT -4
Well Fellas, After 17 days of work, I didn't quite make it - but it got me out of a building slump; I will finish it and post it next week in Bikes & Trikes. Thank you for your support along the way - here's how far I got:  Metallic silver base, Swirladelic artwork and Oldsmobile Engine Blue stripe                    This is just the mock-up; will come all back apart. Still need shoot urethane clear, oil lines, cables, turn signals/mirrors, carb, air cleaner, exhaust pipes and a few other miscellaneous pieces.  Here are the mirror/turn signals. I am not real happy with the gas tank, so here is a new one in German Silver Metallic, ready for Swirladelic art work, blue stripe and clear. Thanks for your patience and your viewing; sorry I didn't make the deadline but look for this one soon in Bikes & Trikes. Congratulations to everyone who got their projects done! Thank you, Jim Looks great Jim, how did you do the "swirladelic" paint? |
|
|
|
Post by AzWildman on Apr 5, 2013 15:10:59 GMT -4
Thanks: Joe, Rick, Harley, John, and Joe66.
Joe66, thats the old paint on top the water then swirl the paint around and dip the part in, I swirl the part around under the water and it clears away the paint on top the water away so you don't pull the part back thru the paint. I am redoing another gas tank for this i'll take some photos of doing it.
I have actually used this technique on 1 to 1 motorcycle sheet-metal using one of those big galvanized watering troth's, until the farmer politely asked for it back so his horses could drink. since he was polite about it, I returned it. It was hard to argue with Mr. Remington, especially when it is held by a polite farmer. after that I built my own dipping tub. haha
thanks for asking
Jim
|
|
|
|
Post by KRAZY RICK on Apr 5, 2013 18:22:32 GMT -4
Are you using basecoat enamel paint, or lacquer Jim ? ..........you couldn't have asked for a nicer pattern
|
|
|
|
Post by AzWildman on Apr 5, 2013 18:40:06 GMT -4
Hey Rick,
I just use Testors enamels, this was Model Masters Olds engine blue. Straight paint on the water.
German Silver metallic, base. I use automotive reducers and enamel hardener, usually dries in two days. Then I use automotive Urethane Clear. Sorry I know that's more than you asked.
Jim
|
|
|
|
Post by DAVE "THE DUKE" ARMSTRONG on Apr 5, 2013 22:36:10 GMT -4
Awesome, Jim- awesome!
|
|
|
|
Post by JOE66 on Apr 6, 2013 16:22:51 GMT -4
Thanks Jim, I`ll have to try that one day. I know about arguing with Mr. Remington, he almost caught me once. We won`t be doing that again.    |
|
|
|
Post by AzWildman on Apr 7, 2013 1:50:42 GMT -4
Here is my technique for doing Swirladelic on a motorcycle tank. 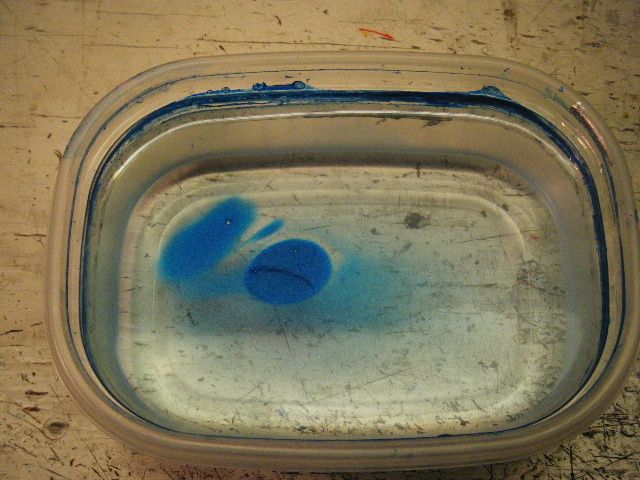 I put a few drops of un-thinned enamel on top of the water.  Gently stir the water to form a pattern. 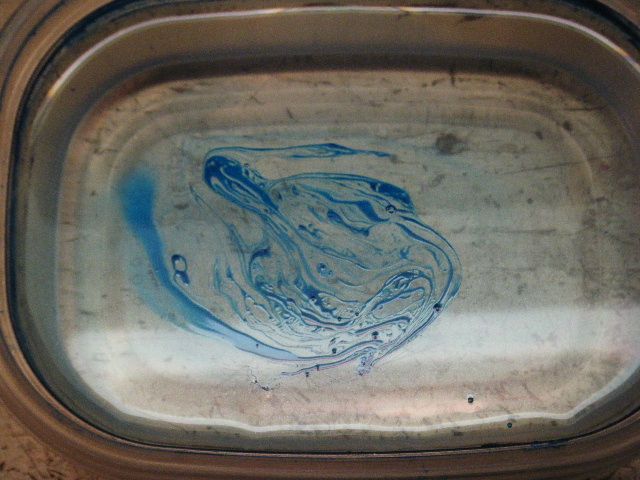 It generally works best to use the first pattern formed, the longer it sits, the paint all bunches back together.  Dip the part into the section of the pattern you like. While the part is under water, swirl the part around to clear away the paint and leave a clear section of water above the part, so that when you remove the part from the water, you don't pull the part back through the paint, destroying your pattern. 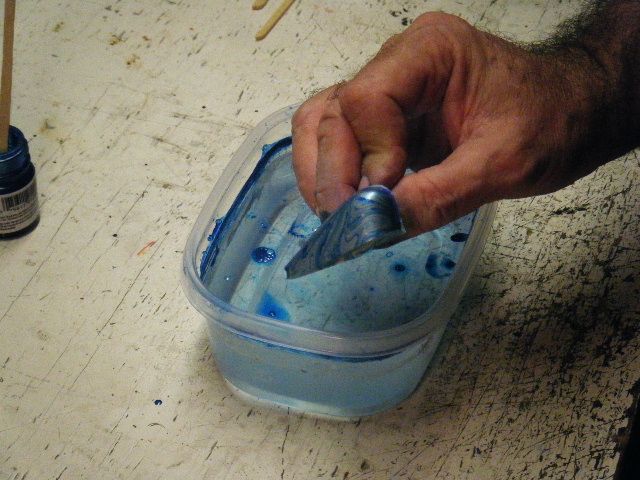 After you pull the part from the water, using a paper towel, lightly dab away excess water from the part. If you leave the water on the part and then dry it, it will usually leave a round spot where the water was. You can do it this way if you want this effect also.  The design is random, you never know what you are going to get. Hope these tips are useful; good luck and have fun trying this technique. Thanks for looking. Jim |
|